

 https://github.com/Raito-Liao/raito-waterfall.git
 下载插件并导入HBuilderX
 下载示例项目ZIP
 赞赏(1)
赞赏(1)
更新记录
1.0.1(2024-09-12) 下载此版本
优化代码并更新组件使用文档
1.0.0(2024-09-10) 下载此版本
新增瀑布流组件
平台兼容性
| Vue2 | Vue3 |
|---|---|
| √ | × |
| App | 快应用 | 微信小程序 | 支付宝小程序 | 百度小程序 | 字节小程序 | QQ小程序 |
|---|---|---|---|---|---|---|
| HBuilderX 3.7.9 | √ | √ | √ | √ | √ | √ |
| 钉钉小程序 | 快手小程序 | 飞书小程序 | 京东小程序 | 鸿蒙元服务 |
|---|---|---|---|---|
| √ | √ | √ | √ | × |
| H5-Safari | Android Browser | 微信浏览器(Android) | QQ浏览器(Android) | Chrome | IE | Edge | Firefox | PC-Safari |
|---|---|---|---|---|---|---|---|---|
| √ | √ | √ | √ | √ | × | √ | √ | √ |
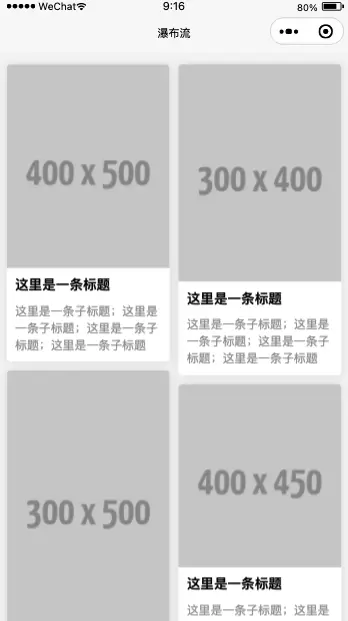
在uniapp插件市场上一直找不到合适的瀑布流组件,于是自己动手写了一个,并在项目中实践出来的瀑布流解决方案
一、我对于瀑布流布局组件的要求
- 要有骨架屏,能提前将基本结构展示给用户;
- 不要挨个渲染,否则如果有图片的话加载将会很慢;
- 可以实现多列瀑布流;
- 绝对不能出现错位渲染,很多瀑布流组件都出现这种情况,特别在页面跳转或Tabs切换下。
- 渲染过程中不能有卡顿影响用户体验。
- 应用于小程序、H5、App等
二、实现讲解
-
计算渲染项的位置 原理都差不多,在获得渲染项的宽高后,将渲染项定位在最小高度的那一列的下面。
// raito-waterfall部分代码 export default { methods: { generateRenderList() { const renderList = [] const { columnCount, columnWidth, skeletonHeight, gutter, lrPading, keyName, cache } = this const columnHeights = new Array(columnCount).fill(0); if (!keyName) { throw new Error('keyName is required!') } this.data.forEach((item, index) => { const itemKey = item[keyName] if (!cache[itemKey]) { cache[itemKey] = { top: 0, left: 0, width: columnWidth, // item宽度 height: skeletonHeight // 骨架屏高度 } } if (index < columnCount) { cache[itemKey].top = 0 cache[itemKey].left = lrPading + index * (columnWidth + gutter) columnHeights[index] += cache[itemKey].height } else { const minHeight = Math.min(...columnHeights) const minIndex = columnHeights.indexOf(minHeight); cache[itemKey].top = minHeight + gutter cache[itemKey].left = lrPading + minIndex * (columnWidth + gutter) columnHeights[minIndex] += cache[itemKey].height + gutter } renderList.push({ ...item, _layoutRect: cache[itemKey], _renderKey: itemKey }) }) const maxHeight = Math.max(...columnHeights) return { renderList, maxHeight } }, startRender() { const { maxHeight, renderList } = this.generateRenderList() if (!renderList.length) { return } this.renderList = renderList this.waterfallBoxHeight = maxHeight }, } } -
如何避免错位渲染?
这种情况发生于页面跳转或Tabs切换,导致获取不到元素的boundingClientRect,也就获取不到元素的高度,于是会导致计算错误。function getRect(selector, context) { return new Promise((resolve, reject) => { const query = uni.createSelectorQuery().in(context); query .select(selector) .boundingClientRect(rect => { rect ? resolve(rect) : reject('Not Found'); }) .exec(); }); }可以这样解决:当createSelectorQuery获取不到boundingClientRect时,使用createIntersectionObserver来监听元素,这样同样可以获取得到boundingClientRect。当重新回到页面或Tabs切换回来时,intersectionObserver会被触发。
// raito-waterfall-item部分代码 export default { mounted() { this.getExtraBoxWH().finally(() => { /* 可能由于页面跳转、元素隐藏导致获取不到宽度和高度,于是通过监听元素来重新获取高度 */ if (!this.contentRect.extraBoxWidth || !this.contentRect.extraBoxHeight) { this.startObserver(); } }); }, beforeDestroy() { if (this.intersectionObserver) { this.intersectionObserver.disconnect(); this.intersectionObserver = null; } }, methods: { startObserver() { this.intersectionObserver = uni.createIntersectionObserver(this, { thresholds: [0, 1], initialRatio: 0, observeAll: false }); this.intersectionObserver.relativeToViewport(); this.intersectionObserver.observe('.content-box__extra', res => { const { width, height } = res.boundingClientRect; this.contentRect.extraBoxWidth = width; this.contentRect.extraBoxHeight = height; this.intersectionObserver.disconnect(); this.intersectionObserver = null; }); }, // 获取extraBox的宽高 getExtraBoxWH() { return getRect('.content-box__extra', this).then(rect => { if (rect) { this.contentRect.extraBoxWidth = rect.width; this.contentRect.extraBoxHeight = rect.height; } }); }, } } -
防止数据频繁变化和渲染项高度变化导致卡顿,需要对其节流
import { isArraysEqual, throttle } from '../../util.js'
export default {
created() {
    this.throttleRender = throttle(this.startRender.bind(this), 100) // 防止频繁调用
    this.handleDataChange = throttle(this.handleDataChange.bind(this), 100) // 防止频繁调用
    this.$watch('data', this.handleDataChange, {
        deep: true,
        immediate: true
    })
},
methods: {
    onHeightChange(item, height) {
        const itemKey = item._renderKey
        this.cache[itemKey].height = height
        this.throttleRender()
    },
    handleDataChange(newData, oldData) {
        if (isArraysEqual(newData, oldData)) {
            return
        }
        this.startRender()
    },
}
}
三、组件简述
raito-waterfall是本人实践过来的瀑布流布局方案,简单易用、兼容vue2、小程序、H5等。
关于列表key: 列表唯一key值是必填的,否则会出现不可预测的表现,同时也是高性能的必要条件,所以您的数据中一定要有唯一值,比如id。
数据更新: 您可以随意地更新data数据,渲染列表会在您每次更新后重新排列。
关于渲染项: 您可以自定义渲染项的样式,raito-waterfall-item只是提供一种最简单的布局方式。但无论您如何定义渲染项,都需要emit渲染项的实际高度。如果您的渲染项有图片,也需要在图片加载完后重新emit高度,可参考raito-waterfall-item对于动态高度的解决方式。
关于图片: 图片大小建议限制在100k以内,过大的图片会影响渲染速度。
实现思路: 瀑布流的布局思路基本是将渲染项放在高度最小的一列,所以需要获取渲染项的高度后才能正确渲染。本组件是直接将数据渲染出骨架屏,不是挨个渲染,然后当监听到渲染项的高度变化后将列表重新排列。
四、使用方式
1. 导入插件
使用HbuilderX导入到项目的uni_modules文件夹中
2. 示例
!!!完整示例请下载示例项目,然后使用HbuilderX运行。
<raito-waterfall
    keyName="id"
    :data="data"
    :count="2"
    :gutter="10"
    :lrPading="10"
    :skeletonHeight="240"
    :animation="true"
>
</raito-waterfall>
3. raito-waterfall属性说明
| 参数 | 说明 | 类型 | 是否必填 | 可选值 | 默认值 |
|---|---|---|---|---|---|
| keyName | 列表key值 | String | 是 | - | - |
| data | 数据列表 | Array | 是 | - | [] |
| count | 渲染列数(2-5列) | Number | 否 | 2-5 | 2 |
| gutter | 渲染项间隔(单位px) | Number | 否 | - | 10 |
| lrPading | 渲染列表左右padding(单位px) | Number | 否 | - | 10 |
| skeletonHeight | 骨架屏高度(单位px) | Number | 否 | - | 0 |
| animation | 是否开启动画效果 | Boolearn | 否 | - | true |
五、扫码体验

H5扫码体验(国内可能会慢一些)
如何您喜欢该插件,记得收藏、好评哦,比心哟!
作者:Raito Liao
邮箱:raito.liao@outlook.com
 下载 173
 赞赏 1
赞赏 1

 下载 9694195
 赞赏 1530


 赞赏
赞赏
 京公网安备:11010802035340号